Directions on How to Make a Cardioid String Art
Using only a circumvolve and directly lines, it's possible to create various aesthetic curves that combine both art and mathematics. The geometry behind the concentric circle, ellipse, and cardioid dates back centuries and is hands found in the world around us. From an archery target to an apple, can you name these geometric shapes?
Y'all will by the cease of this step-past-stride tutorial, and you'll also be ready to try your hand at some geometric art yourself, which yous could then spin into op art or string fine art. To create the bend examples that follow, I used a pencil, ruler, and protractor to mark off degrees and go on things exact. If you want, yous could fifty-fifty use the free computer programme GeoGebra to draw concentric circles, ellipses, and cardioids.


Materials & Tools Needed
For all of these curves, nosotros'll need a few bones geometry tools and drawing utensils.
- paper
- ruler or straight edge
- pen or pencil
- compass for drawing circles (or images of circles or regular polygons)
- protractor (for marking off precise degrees)
Option 1. Making Concentric Circles
Concentric circles are circles that share a midpoint, such as an archery target or a dartboard. The circles, though different size, all have the same bullseye. Regular polygons, regular polyhedra, and spheres can also be described as concentric as they all share the same middle. In fact, in our offset case below, we create a concentric circle by cartoon polygons:
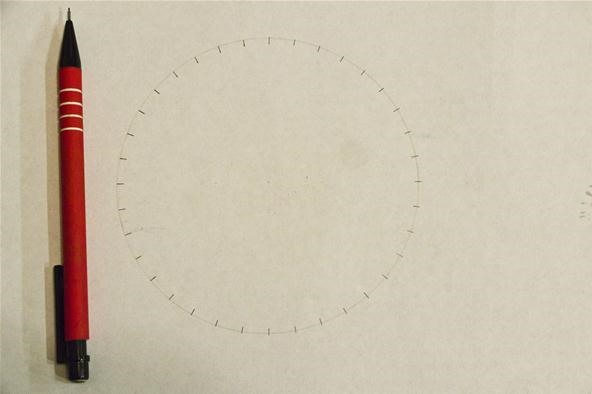
Step 1: Mark a Circle at Even Intervals
This circumvolve is marked every 10 degrees, and so 36 marks total:
Step ii: Connect One Marking to Some other
The number of marks skipped will determine the size of the concentric circle created. I chose to skip 8:
Pace 3: Create Lines All the Way Around the Circle
Have the next mark and connect it to the marking alee of the one you continued the previous i to. Go along doing this.
Based on your first mark, take the side by side mark and connect information technology to the mark ahead of the i you connected the previous ane to, then keep doing this:
The resultant polygon has the same number of sides every bit at that place were marks on the original circumvolve:
You tin can then use the within circumvolve as a starting point for creating another circle:
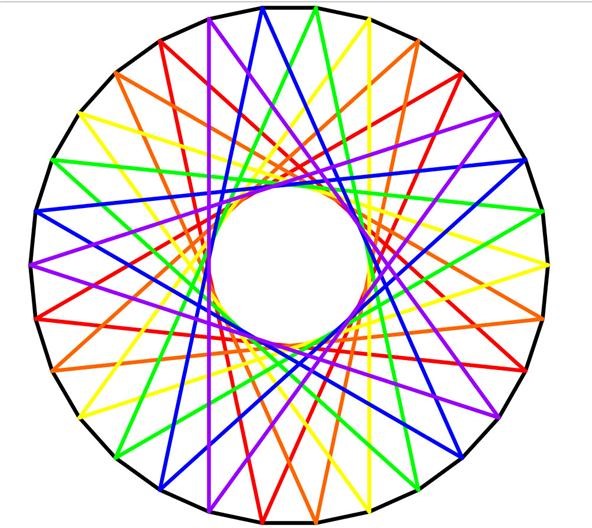
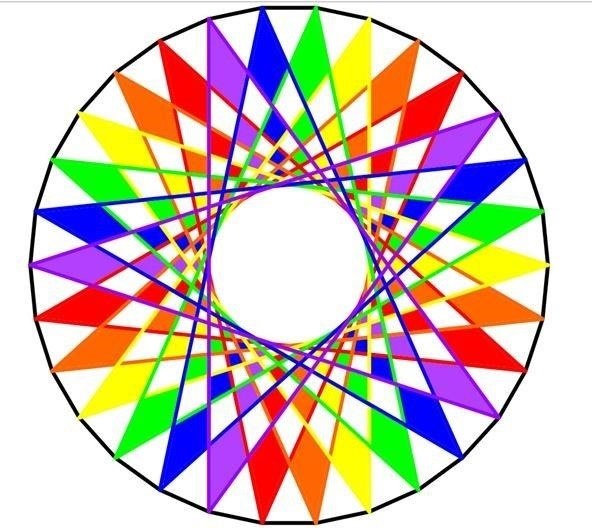
These concentric circle designs are really creating star polygons, equally discussed in the posts on creating star designs on pumpkins and creating torus knots. In the image below, using GeoGebra (Classic), I took a circle with 30 marks and connected them in a design with six pentagrams. This works because 30 / 5 = half-dozen:
Option 2. Making Ellipses
Like the Globe'southward orbit around the Lord's day, an ellipse is a "closed curved shape that is flat" and best described as an oval. This squashed circumvolve has two focal points, where "the sum of the distances to the foci is constant for every point on the bend."
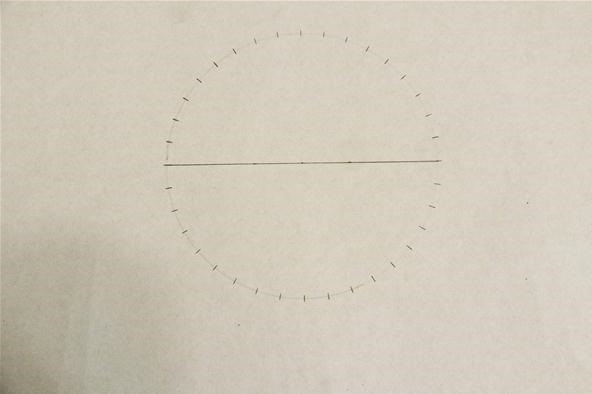
Stride 1: Mark Off a Circle by Degrees
There are lots of means to create ellipses, just this one is pretty fun. Commencement with a circle with a number of evenly spaced marks; I again chose ten degrees. I and then connected two of the marks that were 180 degrees autonomously, halving the circle. This line volition get the major axis:
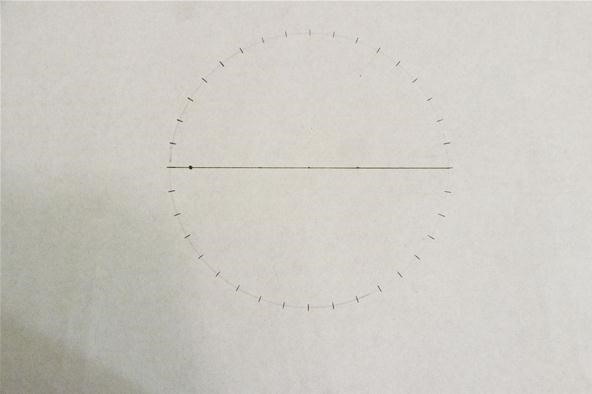
Step 2: Cull a Point on the Major Centrality
Mark a point on your major axis. Making this betoken farther from the center of the circle makes the ellipse longer and narrower.
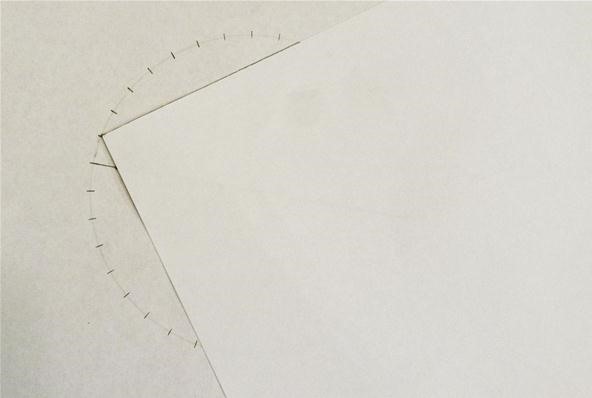
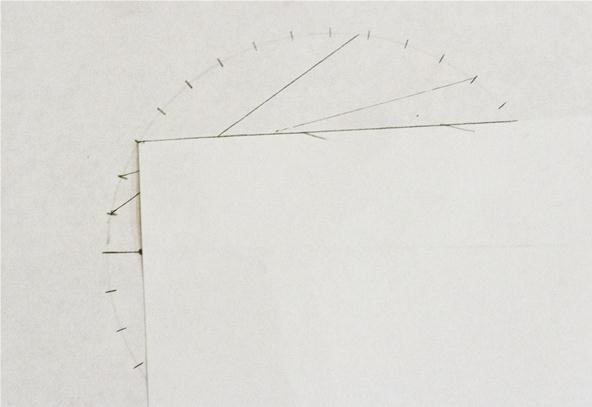
Pace three: Draw a Line from the Focal Betoken
Make a right bending on one of the marks on the circle so that one of the sides of the bending goes through the focus. Connect the line from the mark to where it intersects the circumvolve. Go on this process for all of the marks on the circle:
Halfway done; the resolution increases equally information technology gets farther from the focus:
And here is the completed ellipse. Note you could ameliorate the resolution near the focus by repeating the process using the focus on the other side:
From the ellipse, I went a footstep further and intersected two ellipses at correct angles. The result was the post-obit heart shape, a design that brought me to mind the curve in mathematics that is known for its heart-similar shape, the cardioid, which volition comprehend next.
Choice 3. Making Cardioids
A cardioid is formed by a rolling circle'due south path beyond the circumference of another circle, all the while keeping its radius the aforementioned. The term, first used in 1741 by Giovanni de Castillon (in Philosophical Transactions of the Royal Society, 1741), originates from the Greek word for "eye." An everyday object that holds a truthful cardioid shape? An apple.
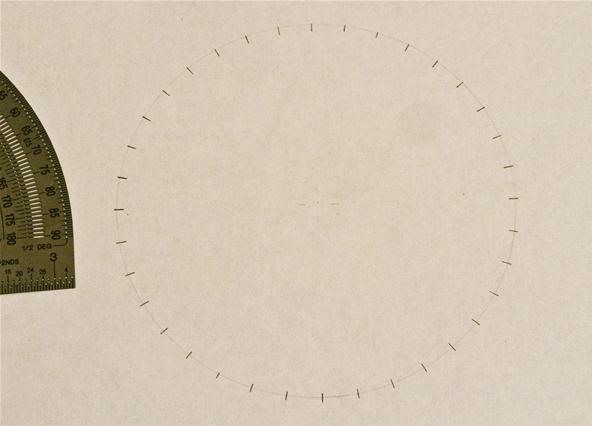
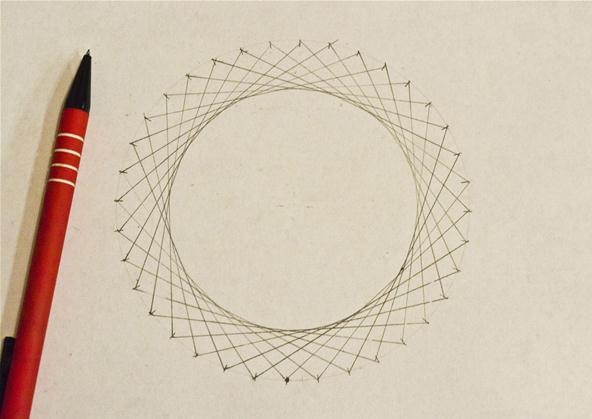
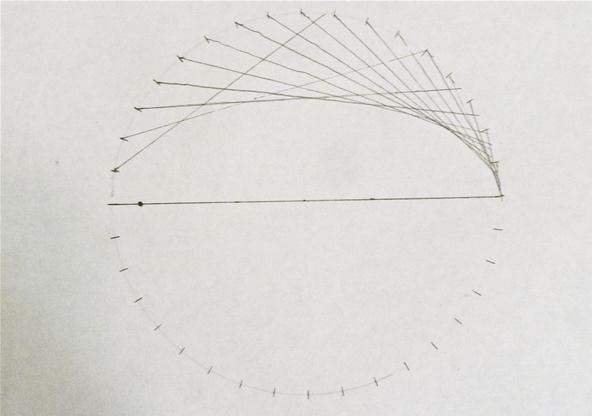
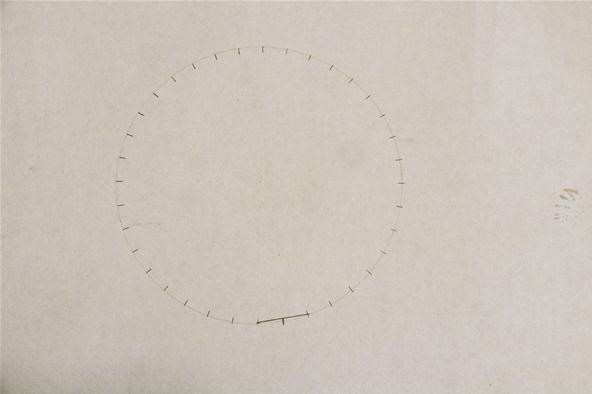
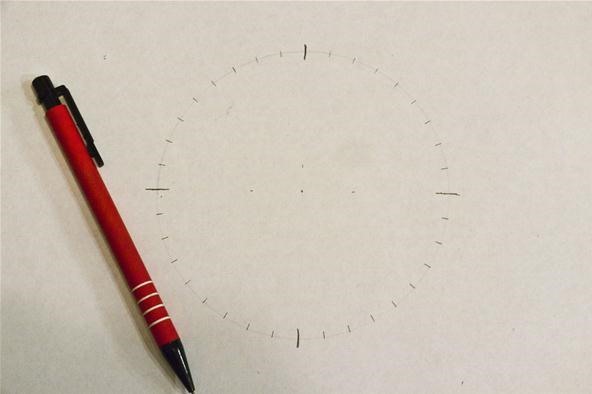
Step 1: Mark a Circle'south Circumference Evenly
To create a cardioid, showtime with a circumvolve with a number of evenly spaced marks; I chose every 10 degrees on this one yet again:
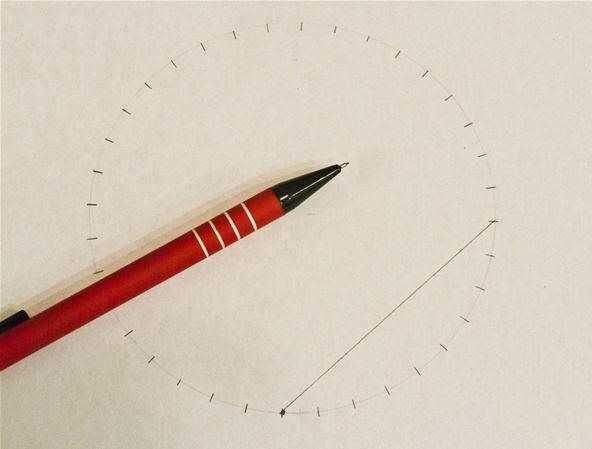
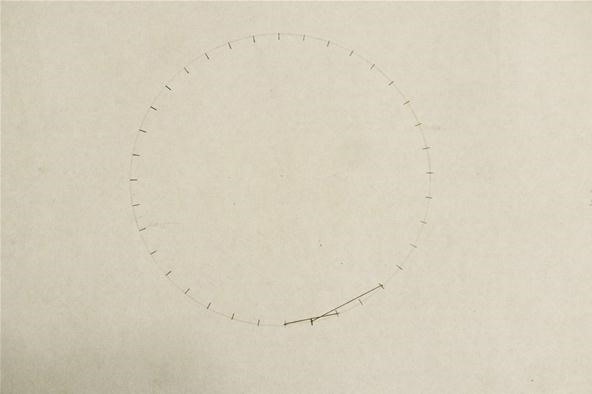
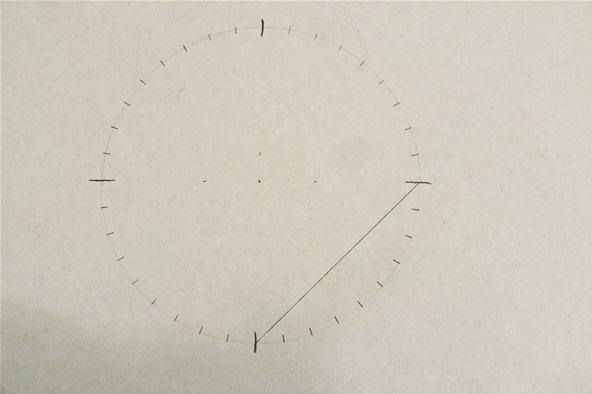
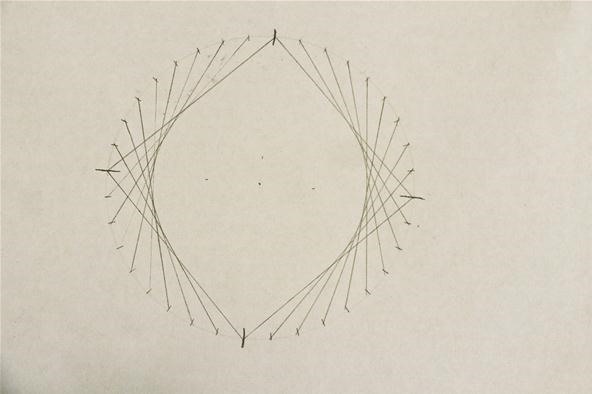
Stride 2: Skip Ahead past Two Marks
Starting with any ane mark, connect a line from information technology to a mark that is 2 marks abroad:
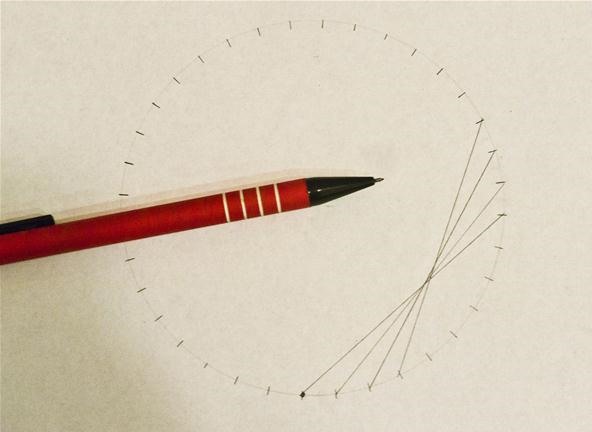
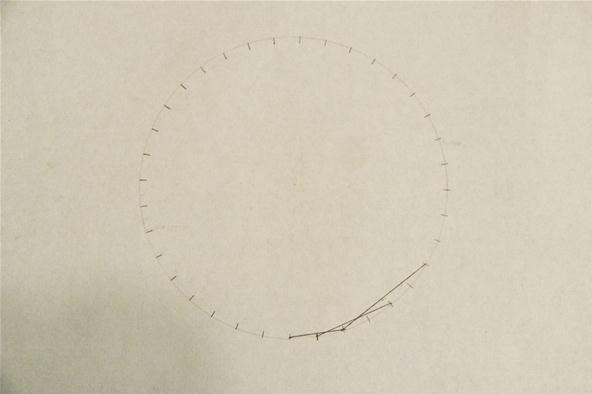
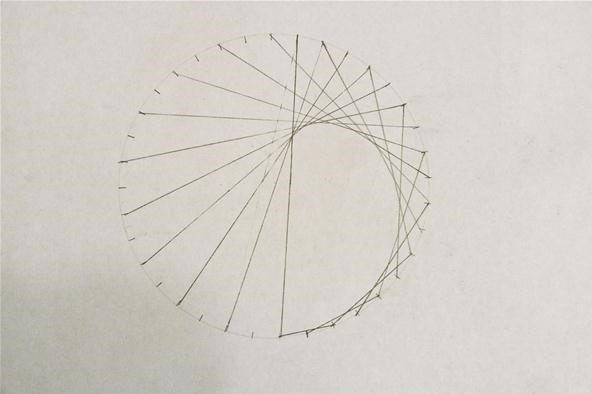
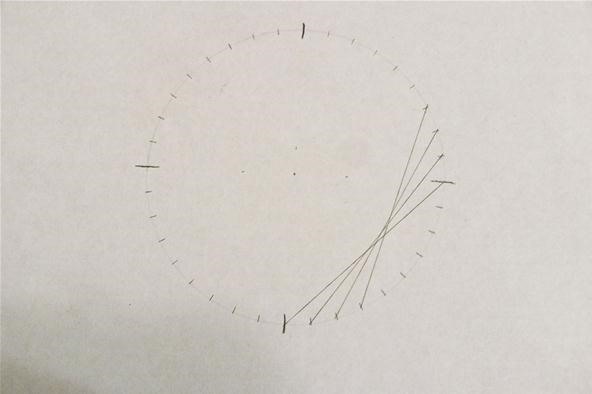
Pace 3: Count by Ones & Twos
Take the next marker after your starting point and connect it to the mark that is two across the ending point of the last marking.
Have the next mark afterwards your starting point and connect information technology to the marking that is two beyond the ending indicate of the final mark. Echo. You are basically counting by ones on the starting points, and past twos on the ending points. Keep going and you'll begin to see the curve accept shape:
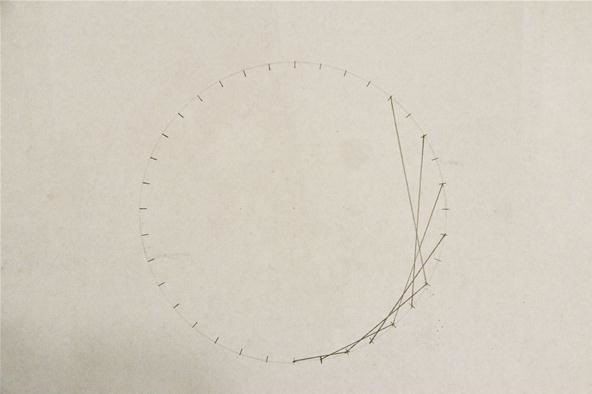
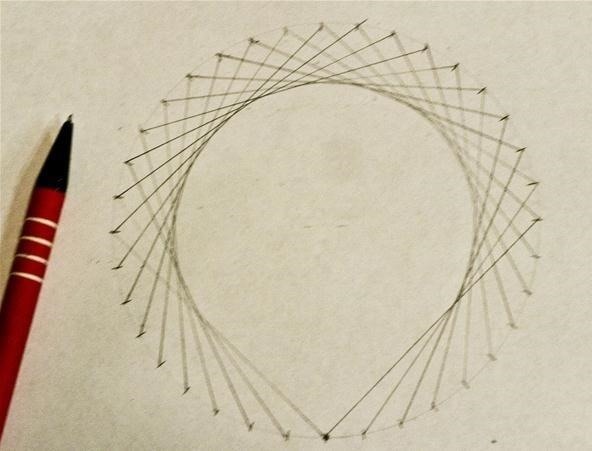
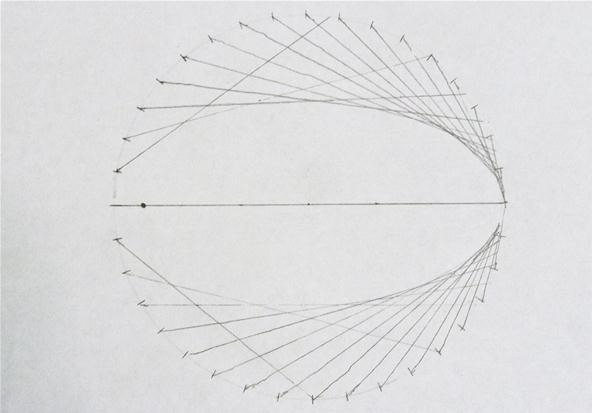
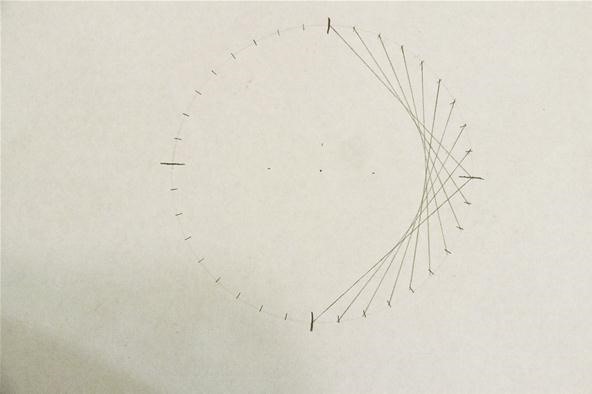
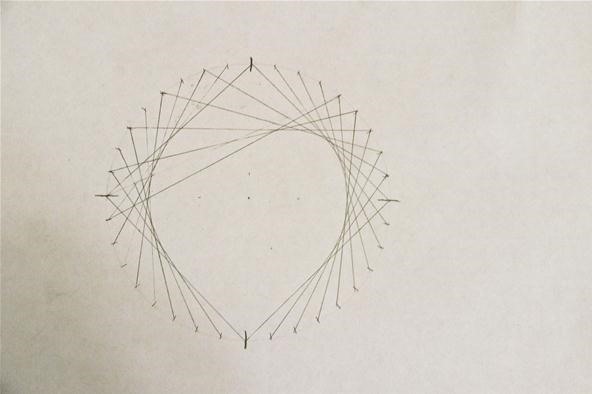
Step 4: Go along on Other Side
To avoid confusion, simply focus on the mark yous're working on: counting by ones for the starting indicate and by twos for the catastrophe bespeak:
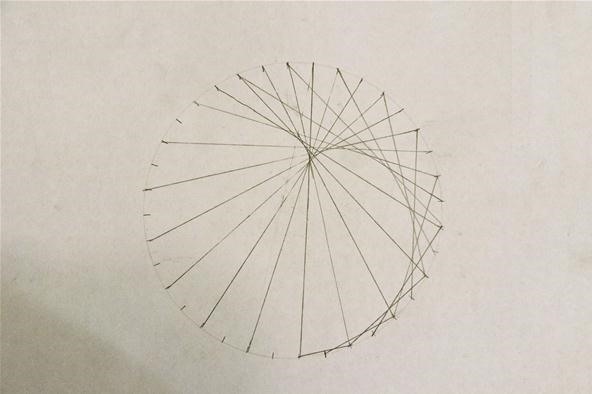
Step 5: End at Original Starting Point
You'll come across the heart take shape once you get completely effectually; end once yous render to the first mark. My completed cardioid:

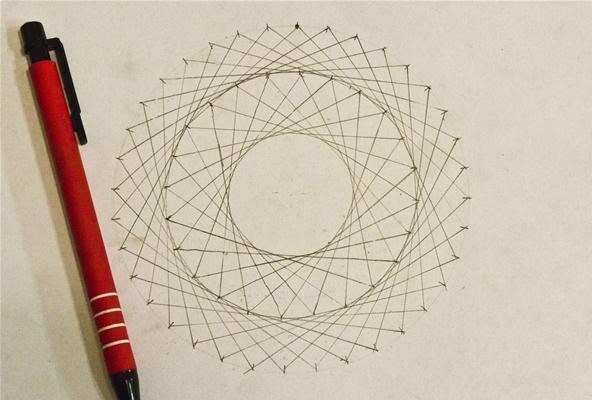
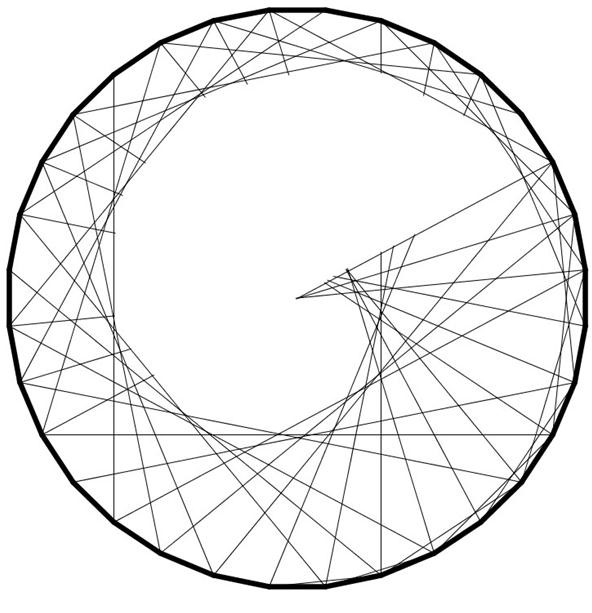
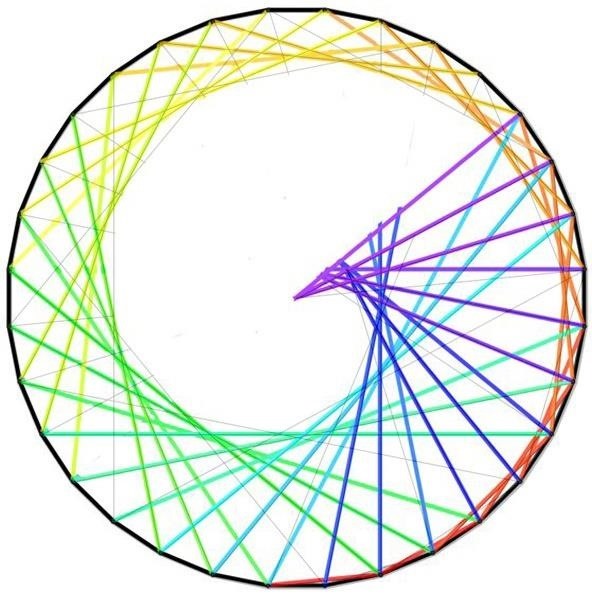
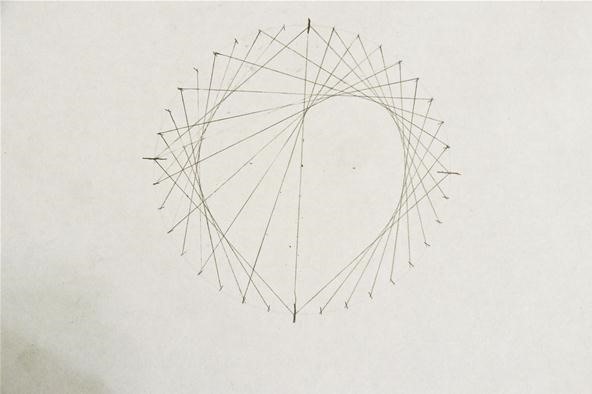
You can follow this aforementioned process only by counting by threes on the catastrophe marks or fours and you will get more than sharp points. If you skip less often, you will become a more gradual screw. The curve beneath was generated by counting past twos only every fourth time.
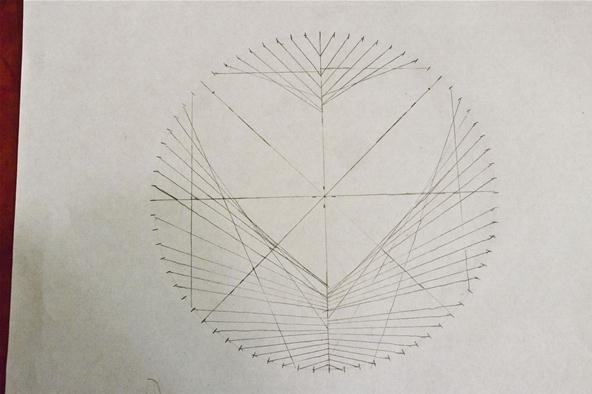
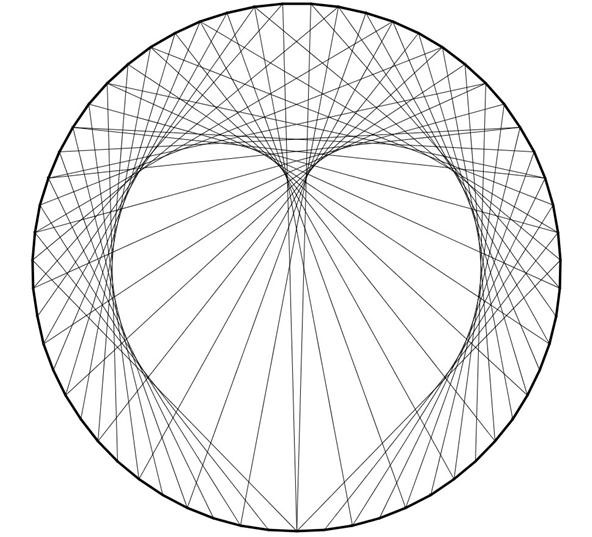
Option 4. Combine Curves & Create a Heart
Inspired, I decided to attempt and pattern a curve that looks more similar a eye past combining linear sections, concentric circle sections, and cardioid sections. I think the final design looks pretty good. What do you think?
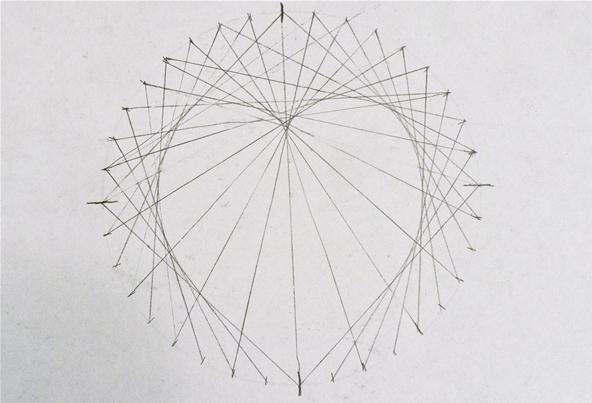
Step 1: Mark a Circumvolve into Fours
To start, you again marker a circle evenly. I chose over again 36 marks. I also made the marks at 90 degree intervals more than visible; these will exist of import markers:
Pace 2: Form the Heart'south Point
From the bottom, describe a line betwixt two of the marks at ninety-degree intervals. This will become part of the pointy end of the heart:
Step 3: Draw Lines for a Concentric Circle
Connect the next marks as if yous were making the concentric circle design. Stop when you go to the line that connects to the point 180 degrees from the starting indicate. You could practise the same on the other side. You might non desire to do this until you are completely done.
Pace iv: Echo Process on Other Side
Though nosotros go ahead and complete the concentric-circumvolve pattern for the opposite side, you tin can choose to wait until you are completely done with one half in social club to keep all the lines/marks straight:
Stride 5: Add a Cardioid Department
Adjacent, you will add a cardioid section, starting at the 90-degree marking right of the center's "point." From hither, connect marks by counting past ones for the starting betoken of the lines, and by counting by twos for the catastrophe points:
Pace half-dozen: Echo on Other Side
With the cardioid section applied to simply half of the circle, you can already see the center forming. To finish the "kardioedides," simply echo the steps for the left side, and your heart is complete!
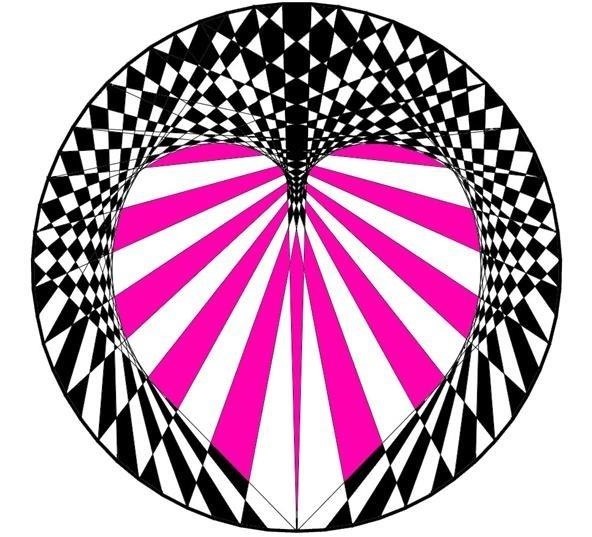
Cool, right? Finally, from this exercise, I took on one more than challenge: Using a calculator plan, I attempted to create the same center design using 59 marks instead of 36. I and then colored it in:
The ideas are pretty fluid when it comes to curves. Now that y'all're familiar with the basic mathematical curves of the concentric circle, ellipse, and cardioid, you, as well, can endeavor your own pattern ideas. Equally we've establish, with a elementary circle and straight lines (and some math logic), you can create any number of geometric shapes and combinations. What does your eye see?
Want to chief Microsoft Excel and take your piece of work-from-domicile chore prospects to the next level? Leap-start your career with our Premium A-to-Z Microsoft Excel Preparation Bundle from the new Gadget Hacks Store and go lifetime access to more than forty hours of Basic to Advanced instruction on functions, formula, tools, and more.
Purchase Now (97% off) >
Other worthwhile deals to check out:
- 97% off The Ultimate 2021 White Hat Hacker Certification Package
- 98% off The 2021 Accounting Mastery Bootcamp Package
- 99% off The 2021 All-in-One Information Scientist Mega Bundle
- 59% off XSplit VCam: Lifetime Subscription (Windows)
- 98% off The 2021 Premium Learn To Lawmaking Certification Parcel
- 62% off MindMaster Mind Mapping Software: Perpetual License
- 41% off NetSpot Home Wi-Fi Analyzer: Lifetime Upgrades
Source: https://mathcraft.wonderhowto.com/how-to/create-concentric-circles-ellipses-cardioids-more-using-straight-lines-circles-0131356/
0 Response to "Directions on How to Make a Cardioid String Art"
Post a Comment